Jeanne and I are taking divergent paths for our posts this time. She’s expanding the Fabric post and talking more about Neutrals. Be sure to check it out!
Among the responses I received to the Skill Builder Series was a question from Shannon, a woman from Malawi, who asked what I considered the bare necessities for quilting tools. I sent an email to her that started with “here’s the short version” and ended with “I’ll probably end up using the email verbatim for the post!” As you’ve noticed, I tend to do a complete brain dump when I write, and emails are no exception. Keep in mind that any brand names I mention are not requirements, simply the brands I have access to and have purchased. For the most part, the brand is unimportant – the features are what matter. Thread is one of the few items that brand matters to me, but the two I mention are just my preference.
After reading my list, are there any other tools you consider “requirements” for quilting? Do you have a favorite brand in any of your tools? I am a machine quilter and so I know my list is skewed away from hand piecing and quilting – is there anything you’d like to add for the hand quilters? Finally, do you have any favorite tools that, while not exactly essential, are the next step beyond?
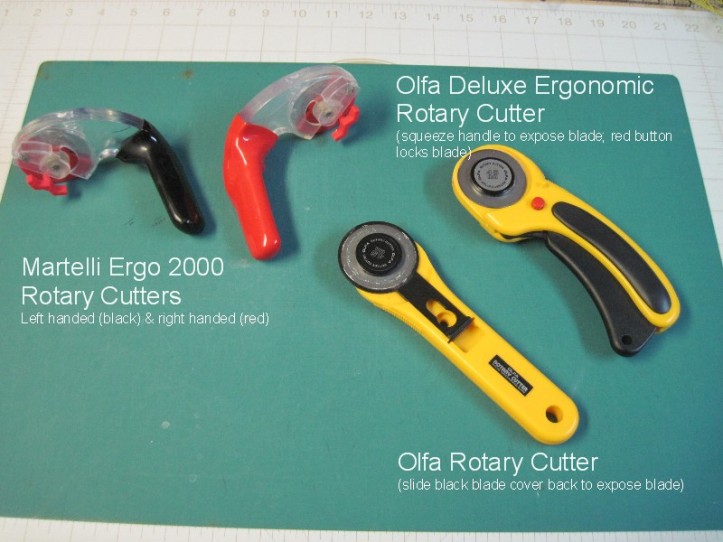
Rotary Cutter: Choose one with a good safety feature – you do NOT want to cut yourself with one of these, they’re razor sharp. Make sure you can lock the blade closed. I love my Ergo 2000, but it uses specific blades that may be more difficult for you to get. Olfa makes good ones, as does Fiskars. If you’re the only person using it, I recommend the Olfa Deluxe Ergonomic Rotary Cutter. If you’re sharing it and left/right handedness is an issue, get a straight handled one instead. As for size, if you can only get one, go with a 45mm. It’s big enough to cut through eight layers of fabric, and small enough to handle a wide curve. Don’t forget to buy replacement blades – you need to change them fairly often (and every time you do you’ll wonder why you didn’t replace the blade sooner). I’ve heard that you can actually use much cheaper carpet cutter blades, found at hardware stores.
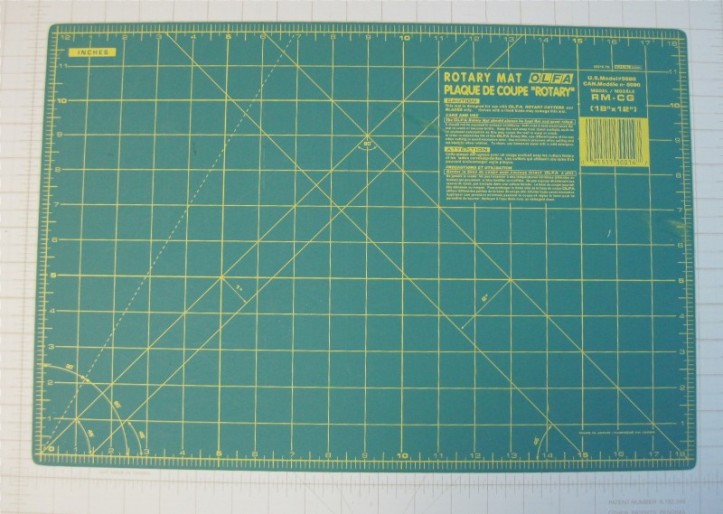
Self-healing mat: Get as big a mat as you can justify, and get a tiny one to put next to your sewing machine for trimming. I’d recommend one at least 18″ x 24″, or 24″ x 36″ if you can manage it. You need to be able to cut fabric from selvage to selvage, and it’s best if you can do it without folding it again. That’s about 22″. I also have a 6″ x 8″ mat for trimming block components (like half square triangles). The rotating ones are nifty, but unnecessary, and far too expensive. Again, Olfa is a good brand, but any mat of the same material is pretty much the same. Just a tip – I don’t like to use the gridded side of the mat – I use the plain side, and rely on my ruler for measuring.
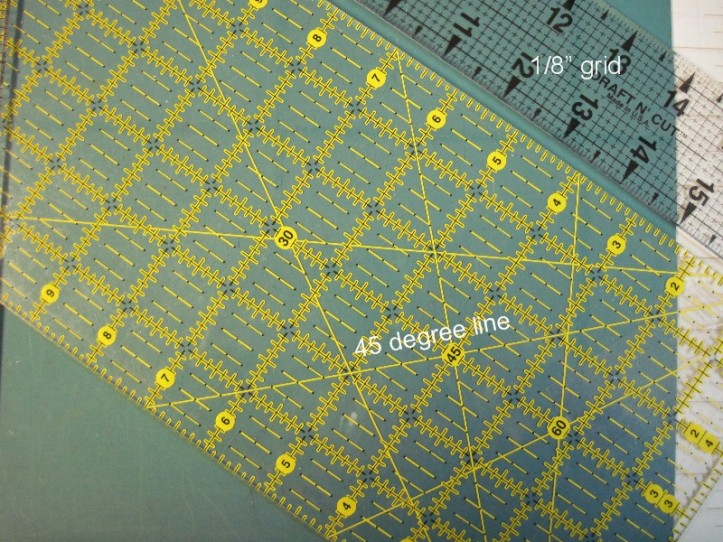
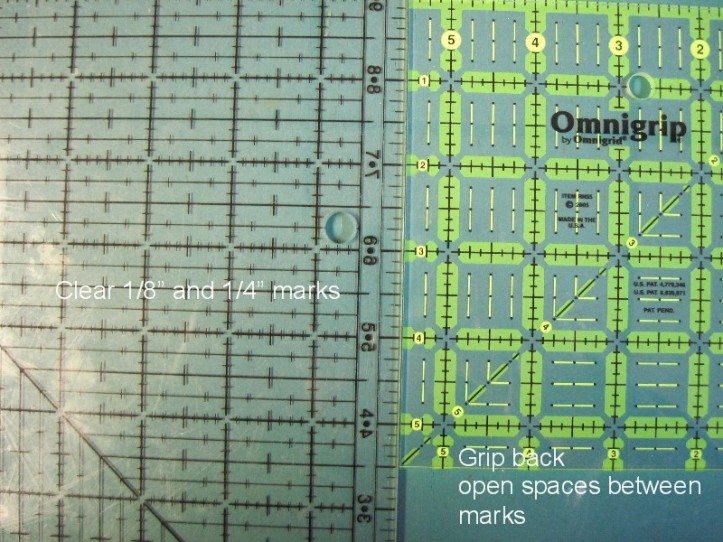
Acrylic rulers: You’ll need a couple of these. One should be long enough to cut selvage to selvage, so get a 24″ ruler. You can choose either a 6″ wide or 6 1/2″ wide. Personally, for the really long ruler I’d just as soon go with the 6″, but it’s really up to you. Make sure the ruler has a 45 degree line on it (it will probably have 30 and 60 degree lines, too) – you may not use it right away, but it could come in handy later. You should also get a 12 1/2″ square ruler. 12″ is a common finished block size, and a 12 1/2″ ruler will help you square up your blocks. I also recommend a 6 1/2″ square ruler for working with the smaller components of your blocks. The 12 1/2″ can be unwieldy. That’s really all you need, but if you want one more, look at a 2″ x 18″ or 3″ x 18″ ruler. I find that I use mine a lot.
There are a lot of features to consider – do you want non-skid backing so they don’t slide on your fabric? Do you want frosted rulers so the markings are easier to see on light and dark fabric? Maybe the rulers with yellow marks on one side and black on the other make more sense to you.
Some rulers use solid lines and others use dashed lines. I like the dashed lines so you can see the edge of the fabric when you’re measuring it. Make sure the 1/8″ marks are easy to see. When I need to measure 1/8″, I use the ruler with the full grid rather than trying to line up the 1/8″ marks every inch. Brands aren’t so important – handle some rulers and try measuring with them. Buy what feels best for you. Obviously, I have an assortment of brands, but I have heard that it’s best to use all the same brand so the measurements are consistent. Out of curiosity, I stacked three different brands of rulers on top of my marked cutting mat and they were exactly the same, so I’m not going to worry about it too much.
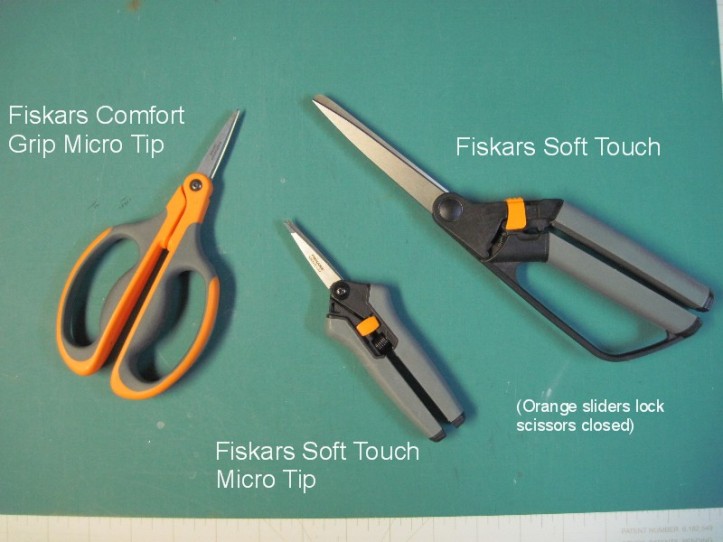
Scissors: Get a good pair of small scissors to keep at your sewing machine for snipping thread. I love my Fiskars Comfort Grip Micro Tip scissors – they have a large handle and small blade. I also have a Fiskars Soft Touch Micro Tip – similar principle with the small blade, but this one has a spring that makes it easier to open the scissors. For small nipping, this isn’t a big deal, but I also recommend a large pair of scissors that are used only on fabric. For the larger scissors, the spring is wonderful (check out the Fiskars 8″ Soft Touch). If you have to do a lot of cutting, your hands will be much less sore. I don’t use the larger scissors as much – in fact, I tend to use them only when I’m doing paper piecing. Otherwise most of my fabric cutting is done with the rotary cutter.
Seam Ripper: Much as I hate to say it, your seam ripper is your friend. I prefer one with a larger handle and the classic U shape, but there are some curved blade ones that look interesting.
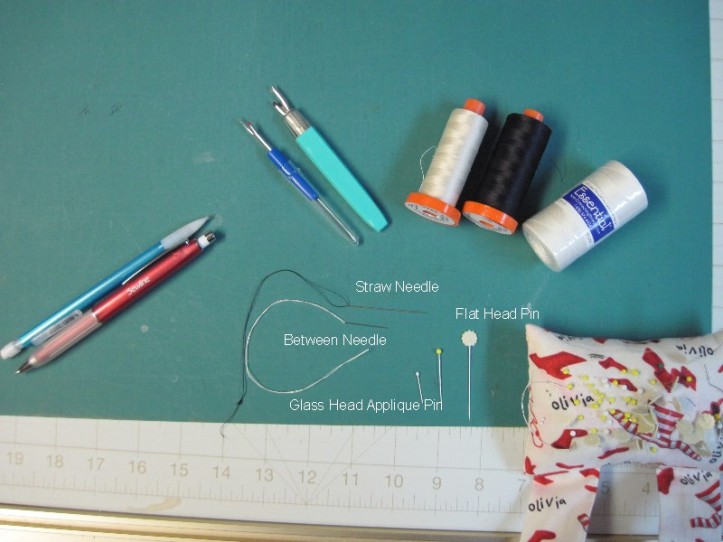
Pins: Believe it or not, pins matter. If you’re going to use pins (and I often don’t), you want ones that are suitable for the way you’re using them. For pinning blocks and block components together, look at long, thin pins with flat heads. For applique, check out shorter pins with glass heads that are heat resistant.
Needles: There are many ways to attach the binding to a quilt, but one of the more popular involves hand sewing on one side. Ten different people will give you ten different opinions on the best needles to use – here’s mine. Look at straw needles. They’re long and thin, making them easier to handle. The smaller the number, the larger the needle. Straw needles are good for hand applique, if that interests you. I’ve also used sharps for hand sewing the binding, and they work well. For hand quilting, “betweens” are recommended because they are stronger and less flexible. It allows you to gather several stitches on your needle before pulling the thread through. I haven’t hand quilted, and that’s about the extent of my knowledge!
Thread: For piecing, traditional wisdom says that 100% cotton is best because it is the same as the fabric you’re sewing together, and they will wear consistently. Some people say polyester thread is fine for piecing, but I stick with the cotton myself. I do use poly for quilting, however. When choosing your piecing thread, be aware of the size of the thread. There are two numbers in the thread measurement. The first is the thickness and the second is the number of strands. So 50/2 thread has two strands, while 40/3 thread has three strands. Like needles, the smaller the number, the larger the thread. I recommend using 50/2 or finer thread for piecing because it helps with the 1/4″ seam allowance. Skinnier thread means less bulk to fold the fabric over. I admit, I love my Aurifil thread, but it isn’t cheap. I recently tried the thread from Connecting Threads (online), and I’ve had great results.
Iron: You need a good, hot iron that doesn’t shut off too quickly. It’s a safety feature, but I hate when my iron shuts off when I’m quilting.
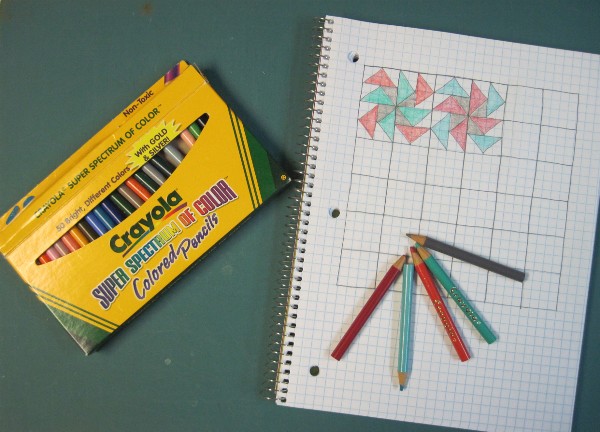
Graph paper and colored pencils: Designing your own quilts is not that scary once you learn the basics. An assortment of colored pencils or markers and some graph paper are a great way to get started. You can recreate blocks you’ve seen, create your own, or design an entire quilt. You don’t have to buy graph paper – you can download free PDFs and print your own. Incompetech has a huge variety of graph papers, including squares, hexagons, triangles, rectangles – even circles.
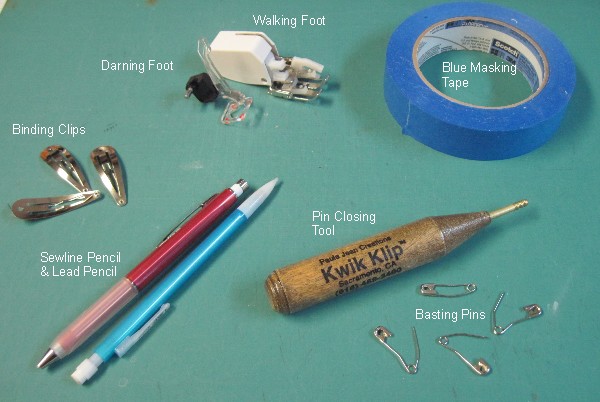
Fabric Marking Pencil: Be sure to find something with white lead for marking on dark fabric. (I just use a cheap mechanical pencil with regular lead for lighter fabrics.) There are a lot of marking tools available, but look for one that gives a sharp line, is visible on dark fabric, and erases easily. I prefer mechanical pencils because they provide a sharp line every time. I use Sewline with ceramic lead, but I see that Dritz has a mechanical pencil with ceramic lead, also.
Blue painter’s tape: This stuff is so handy! You can cut a chunk out of the roll and stick it to the bed of your machine to give you a 1/4″ guide, you can use it to mark quilting lines, you can stick blocks to the wall to play with layout… It doesn’t leave a residue and it’s easy to remove. Find it at the hardware store.
Walking foot for your sewing machine: Straight line quilting is very popular and looks great on most quilts. A walking foot helps move the fabric through your machine more evenly, moving both the top layer of fabric at the same time the feed dogs are moving the bottom layer.
Darning (Open toed) foot for your sewing machine: If you decide to free motion quilt, an open toed foot will make it easier to see what you’re doing.
Quilt Basting Pins: These are bent safety pins that you use to fasten the layers together before quilting. They are NOT a necessity, just one of the more popular methods for basting a quilt. There’s an inexpensive tool you can use to help open and close the pins, too.
Binding Clips: Fifteen years ago, these were just plain old snap clips for hair, and you can still find them at beauty supply stores in bulk for a lot less than you’ll pay in the notions section of a craft store. They’re great for holding the binding in place as you’re hand sewing. I only use five or six when I’m binding my quilt, moving them ahead as I sew, but some people like to clip an entire side or even the whole quilt.
I’m probably missing some stuff, but I think that covers the basics. Of course there are a lot of fun toys out there, including specialty rulers for every shape and technique, different size rotary cutters, templates for cutting and for quilting, tools to help you quilt the layers… it goes on and on!
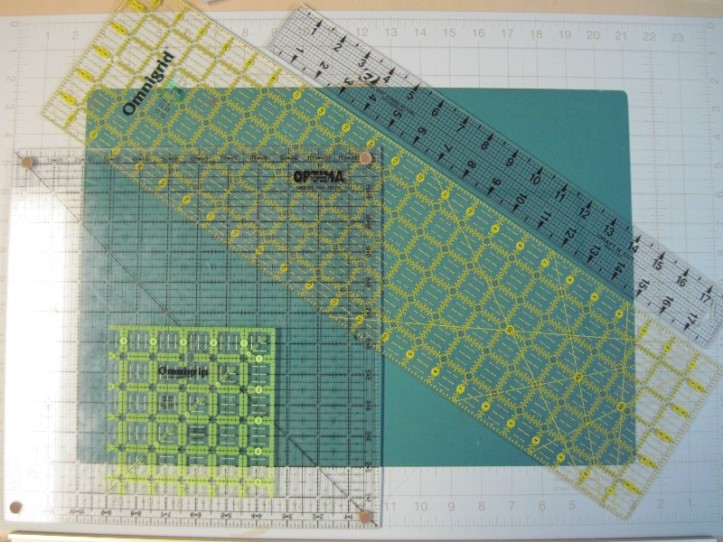
I have some acrylic rulers that have strange measurements. One in particular has the correct markings on the outside, but the lines in the middle run askew. (So if you measure from the 3″ mark on either side, you’re fine, but if you try to use the 3″ marking in the middle of the ruler, you’ll wind up 2/8 of an inch too wide.) I have two wonky rulers, and they’re both marked with coloured dots. They have uses, but I don’t use them for cutting fabric. (One is 6.5 x 6.5-inches, and is the right size around the outside, so it’s good for sizing components.)
WOW! You took a lot of time and work to create this post! It is amazing! You and your partner should consider an E-book with all the wealth of information you are creating with this series. It really is informative and a huge gathering of important knowledge! Congratulations on a wonderful series!
I am far too impatient to use a seam ripper properly! I can’t tell you how many pieces of fabric I’ve ruined by running the seam ripper too quickly up a seam. I’ve got a different technique that requires small scissors with finely pointed blades. I cut every 3rd or 4th stitch along the seam, then pull the thread from the opposite side. The opposite thread usually comes out in a long piece, and makes the cut stitches pop loose for easy removal. So, although I still have a seam ripper in my quilting arsenal, I find the fine-pointed scissors to be a more valuable tool!
I recently purchased fork pins and have to say they should be a basic for quilters. I wish I had known about them years ago! Seam abutments are so much easier & precise with them! Well worth the money! Jan
Related to Angie’s comment above “I am far too impatient to use a seam ripper properly!” – I don’t think i know what “properly” is for a seam ripper, i’m always scared of ripping my fabric rather than my stitches. Do you have any tips on that for later posts in this series?
Thank you for this interesting list. I have most of them but I’ve never heard of a “pin closing tool” – I’ll have to seek one out!
Question for Jan W (or anyone else): What are “fork pins”?
Marsha, fork pins are a U shaped pin that is sharp on both ends of the U. You can use it to pin on both sides of the seam at the same time. Click here to see a photo.